

NOTD: cotton candy with glitter, Barry M Baby Pink and Essence Space Queen
I am loving pastel pink shades at the moment, so here is my new manicure with Barry M Baby Pink and Essence 04 Space Queen. it reminds me of cotton candy :)

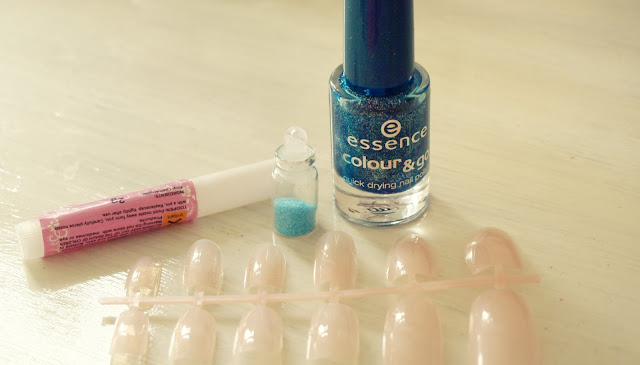
NOTD- blue glitter dust dream manicure
I ordered some false nails recently and I love the look of them. It also means that I can use as much glitter as I want :) I created this blue glitter dust manicure yesterday and it looks so nice :)
Perfect Friday nails.


Perfect Friday nails.

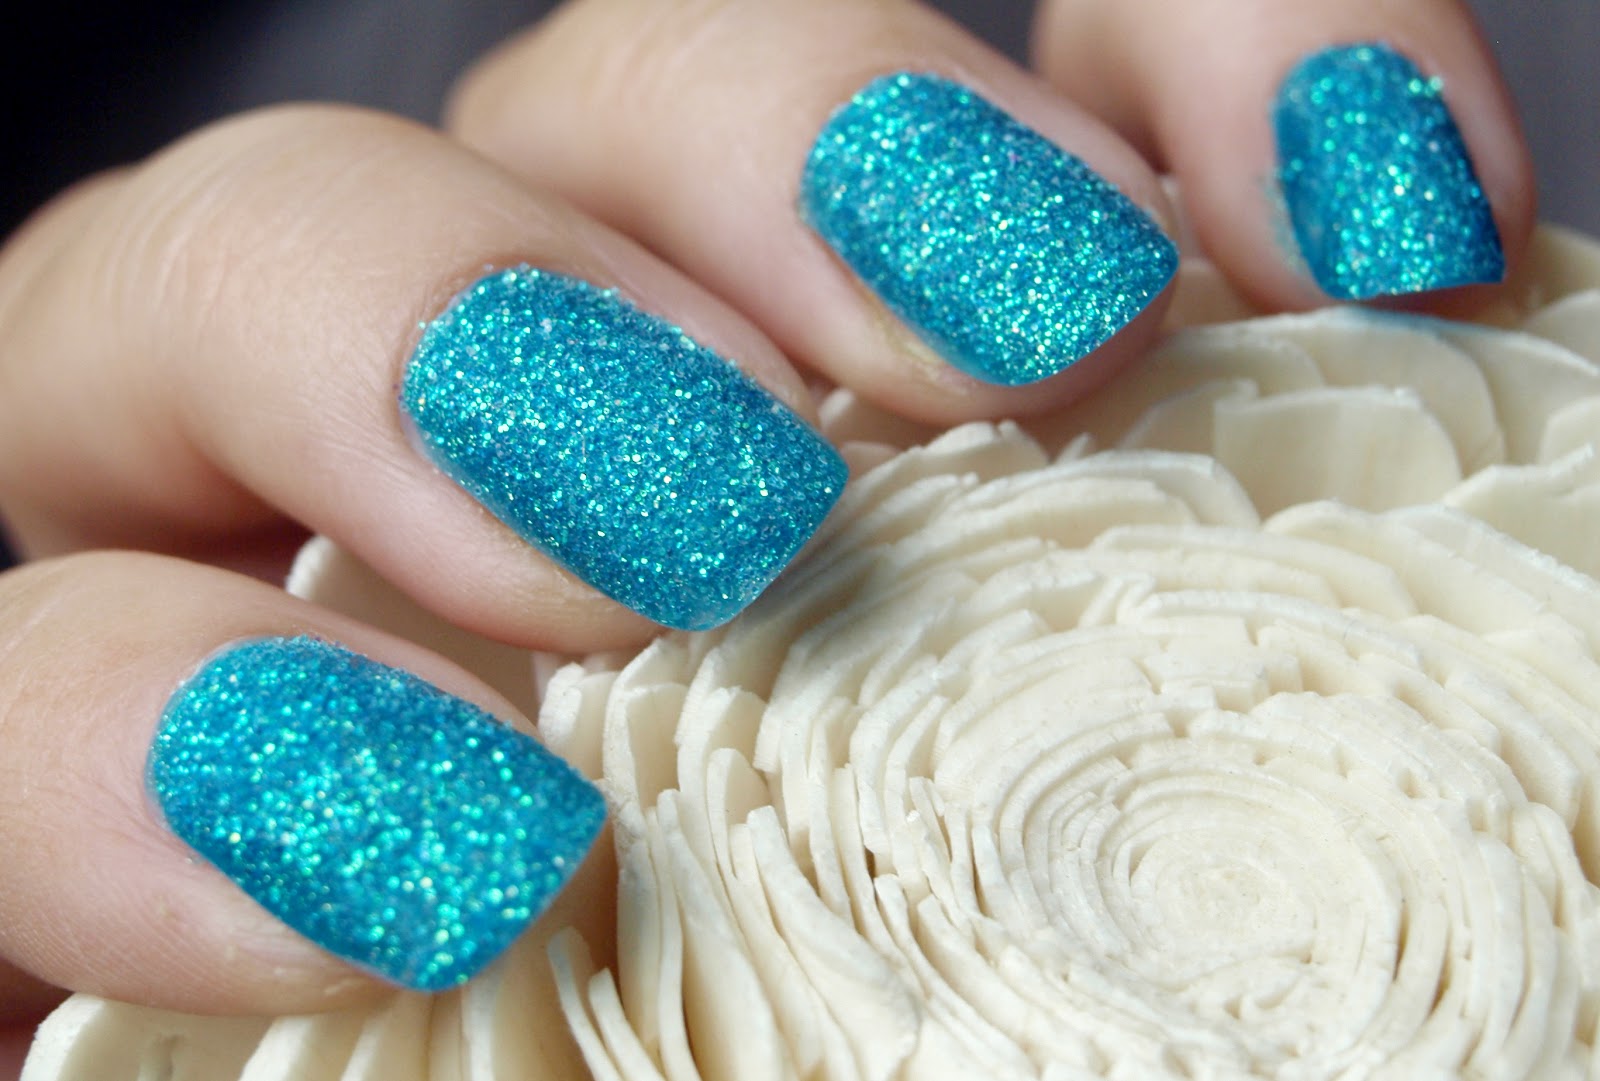


I used: false nails, glitter dust, Essence 38 Choose me

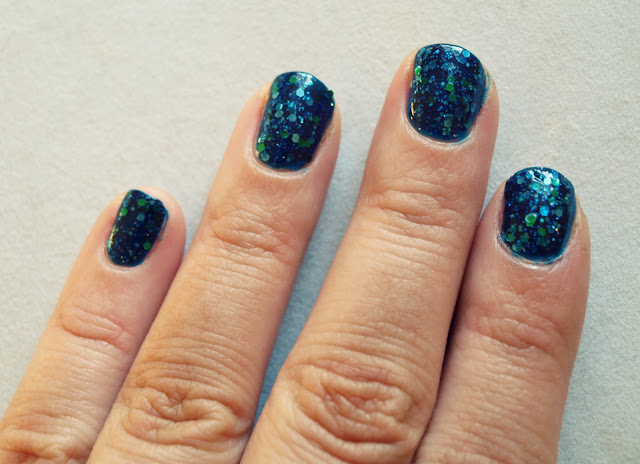
Deborah Lippmann Across The Universe dupe- Essence Blue Addicted 78
As soon as I seen the Deborah Lippmann Across The Universe swatches I knew that I needed it in my life. Unfortunately the price tag was just too high... I know... I already own 5 Deborah Lippmann nail polishes and I would love to buy more, but my husband wanted to kill me when he found out how much I spend on nail polish :) He is right, the prices are absolutely shocking and I need to rethink some of my purchases, before I buy another ridiculously expensive nail polish.
I asked Ana to get the dupe of Across the Universe from Essence called Blue Addicted for me.
I have seen a few bloggers doing a comparison and the swatches looked exactly the same. The only difference is the price tag! :)
As soon as I opened the package from Ana I started unwrapping all the nail polishes with my little helper Zachary :) I found the gorgeous Blue Addicted and painted my nails right away :) I wanted this nail polish so much!!! If you are not obsessed with nails, you are probably thinking that I am crazy, getting so excited about a bottle of nail varnish :) but I was dreaming about this one for ages and couldn't get it in UK. Now it is finally here and I am extremely happy! :) I need another 10 bottles of it to make sure it never runs out :)


My first beauty swap with Ana.
Hi everyone!
Today was a little bit like Christmas :) I received a package from Ana, full of amazing goodies.
Ana is one of my favourite bloggers and I was very happy when she offered to do a swap with me.
If you would like to check out her blog, here is a link www.withloveana.blogspot.co.uk.
Ana is such a lovely girl and her blog is very addictive!!! She has the most amazing nails :) and great taste for beauty products and fashion. The quality of her photos is simply AMAZING and I also adore the inspiration photos she includes in her posts. You should definitely check it out!
I absolutely love everything Ana got for me and I didn't expect to get so many products! :)
I think that many British bloggers feel overwhelmed with the amount of products they receive in swaps, simply because UK prices are shocking compared to other countries.
The swap was an amazing experience and I really enjoyed it.
It is a great way to get products from other countries and meet amazing people, so I would definitely recommend it!
THANK YOU FOR EVERYTHING ANA! xoxo

all the goodies, including some of my dream nail polishes from Essence :) !!!

Essence colour & go polishes! I can't describe my excitement!!!

more essence, catrice and she

how cute is that? mini Essence lipglosses, the packaging reminds me of Benefit kits :)

gorgeous hand made headband by mimi

He-Shi Express Liquid Tan and Day To Day Gradual Tan review +before and after
Today I am reviewing two products from He-Shi: Express liquid Tan and Day To Day Gradual Tan. You already know that I love fake tan. It is the only way to get a tan in Scotland :) Sunbeds are big big NO NO!!! I don't want to get skin cancer or look like a leather couch when I turn 30 :) Fake tan is the only safe way to get a nice healthy glow and make you feel more confident!
I have never tried Liquid Tan before so I was very excited to give the He-Shi goodies a go. I already reviewed the bronzer, so if you want to have a look, here is the link.


I am very impressed with this tanning solution! I have never used liquid tan before and I just didn't realise how amazing and easy it is. It is literally EXPRESS TAN! One thing you need to remember is EXFOLIATION. It is a very important step, especially when you use liquid tan. Don't ever skip this step if you want your tan to look gorgeous.
When I received the package I ran to the bathroom to try the product on my legs and I was very happy with the colour, but I forgot to exfoliate and the tan ended up looking patchy. It was my own fault and I was very annoyed. I exfoliated my full body in the evening with exfoliating gloves and an oil free body scrub, moisturised dry areas of my body with an oil free moisturiser and applied the Liquid Tan with the He-Shi tanning mitt. The application is so easy, the liquid glides onto the skin leaving a gorgeous guide colour with no streaks or ugly patches. You can see the difference in the before and after pictures below. Amazing results in a couple of minutes! The fading process was very 'graceful' and I was using the Day To Day Gradual Tan all week to keep my skin soft ant top up the colour.
Another thing worth mentioning is the fact that as soon as you apply the tan you can put your clothes back on, as it dries instantly. Remember to avoid contact with water for 6-8 hours though. It didn't stain my bedding at night and a little goes a long way so it is worth the £20 price tag. You can also get 300ml (a lot of product) for £30, saving yourself £10.

before and after using He-Shi Express Liquid Tan (it's the guide colour). It is less orange after a shower.


HE-SHI Day to Day gradual tan 200ml* £14.50 link
This gradual tanner is perfect if you have fair complexion or if you want to maintain the Liquid Tan and keep your skin moisturised and silky soft. It absorbs very quickly and smells lovely. By using this product every day I managed to keep a lovely tan for over a week! It is very important to keep moisturising your skin if you use fake tan and a gradual tanner gives the best results.


HE-SHI tanning mitt* £4.50 link
I have tried many tanning mitts before, but this one is simply the best. It makes the application easy, it doesn't tear and helps to get a nice even finish.
*PR samples
Beauty haul: TK Maxx, Boots and a great magazine freebie
I went to TK Maxx on Monday and I just couldn't resist picking up some goodies (c/o husband)
I got two sets of Stila makeup for £7.99 and £9.99. WHAT A BARGAIN! I will be doing a separate post about it.
I also got two Pixi nail polishes, as set of scented nail polishes and an eyeshadow palette.
From Boots I got Soap & Glory exfoliating gloves and Barry M magnetic nail polish.
The best find was the Liz Earle Cleanse and Polish that was a freebie with RED magazine. I wanted to buy more to stock up on this amazing cleanser, but I only got one :)


Bourjois magic Nail Polish Remover review. 1 second per nail?

I can't even describe how much I love this product. I am sure you've heard about it already, but... I really want to share my thoughts. I couldn't wait to get it from Boots and I kept checking my local store. I finally got my mitts on it on Monday - yay!
Does it work? Well... it doesn't remove the nail polish in 1 second as it claims, but I didn't expect that anyway :)
It removes one coat in 5 seconds and 2-3 coats in 10-20 seconds. No scrubbing and no damage to the nail. Simply dip your finger inside the bottle and twist until the nail varnish is removed. MAGIC!!! One bad side of it is the smell. It is very strong when you open the bottle and it can give you a headache. But when you are done, your nails are clean, nourished and smell of sweet almond oil. The acetone-free formula is gentle on nails and cuticles. It is my favourite nail polish remover ever! It is simply amazing!
I wouldn't recommend it for removing glitter nail polish though, because it will damage the sponge.
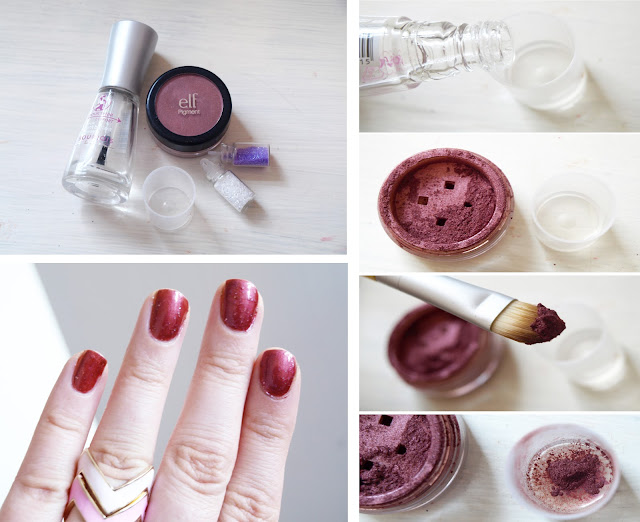
DIY: How to make your own nail polish
I always wanted to make my own nail polish and I didn't realise how easy it was! You will need:
-clear nail polish
-eyeshadow pigment or any crushed eyeshadow in a powder form, glitter if you like it :)
-eyeshadow brush
-bottle cap/lid/container- anything you can find
Pour some clear nail polish into the container. Using an eyeshadow brush put some pigment into the container. You won't need a lot. Add some glitter if you want. Mix all the ingredients with your nail polish brush until you get a smooth mixture. Now you can paint your nails :) I used 2 coats.
I will be trying to make more colours later on this week.

Subscribe to:
Posts (Atom)