LIZ EARLE CLEANSE AND POLISH HOT CLOTH CLEANSER REVIEW

Hi everyone.
The product I am reviewing today is the famous Liz Earle Cleanse & Polish Hot Cloth Cleanser*.
I have seen this product on most beauty blogs and I am sure that you've read a few reviews on it already.
I was kindly sent this cleanser to review and I have been using it for over 2 weeks (morning and evening) and now I can share my opinion.

 
Liz Earle Cleanse & Polish Hot Cloth Cleanser 100ml* £14.25 link

I received the 100 ml pump starter kit. It comes with a handy bag and 2 muslin cloths and retails at £14.25.  There is a wide selection of sizes available, starting from a 30ml tube with 1 muslin cloth for just £5.50. If you like "try before you buy" Liz Earle gives you the opportunity to buy a small tube at a reasonable price.

In the morning I massage the product onto dry skin and use the muslin cloth to polish it off, concentrating on my problem areas- nose, forehead and chin.  Quick splash of cold water to remove any leftover product, followed by a toner and a light moisturiser and my skin instantly feels nice and fresh.

In the evening, to remove my make up, I apply the cleanser allover my face, concentrating on the eye area, to remove waterproof mascara. I wear quite a lot off eye make up and this cleanser removes it really well, without irritating my eyes. I use cotton wool pads for this and  the muslin cloth to polish off the creamy cleanser allover my face. I love the texture of this cleanser- it feels like a thick and luxurious moisturising cream and smells amazing!

TIP: Rinse the cloth in hand-hot water and wring out before gently wiping off the cream. Rinse and repeat. The muslin cloths should be put in a machine wash after a few uses, to make sure they are clean and not breeding bacteria.

After over 2 weeks of everyday use I noticed that my skin feels much softer and looks more radiant. Dry patches of skin on my nose disappeared and I can really see a difference.

The muslin cloth plays a big part in this skin care routine. It helps to gently exfoliate and remove dead skin cells, which is perfect for those who don't like too many steps in their skincare routine. 

All the ingredients are natural including creamy, moisturising cocoa butter, eucalyptus essential oil, chamomile essential oil, pro-vitamin B5 and beeswax to relief chapped skin.

You can get this cleanser from Liz Earle website here. Available in sizes: 30ml, 50ml, 100ml, 200ml.

*PR sample

NOTD- musical notes

This design was the hardest one I have ever done using my Konad stamping kit. It was my third attempt and every time something went wrong. I don't have the special Konad nail polish for stamping, I used MUA instead... but it didn't work very well with this design, as there is too much detail.
Here is the final result, excuse my cuticles ;)

The Best Ways To Improve Your Child's Focus

Some children might have periods whereby they lose attention and focus in school and general life. Some children might dislike the school learning environment or might spend too much time on technology, which interferes with their social confidence. 


Either way, it is important to help improve and maintain your child’s attentiveness so they can carry this trait forward with them into adulthood. Focus and attention are great traits to have as they will allow a child to grow into someone that cares about their future and wants to achieve the best. 


Here are the best ways to help improve and maintain your child’s focus.

MAC FANFARE Lipstick REVIEW

Hi everyone!
I was very lucky to win this beautiful lipstick on a blog giveaway from lovely Kimmi.
This is my first ever MAC lipstick, so I was extremely happy when I got it. My expectations were really high, as I read many positive reviews about MAC products. I need to admit- I am very pleased with this new addition to my small lipstick collection. 
The shade is called Fanfare and it has got a cremesheen finish. The colour is gorgeous, salmon pink with coral undertones. It is perfect for a daytime look with natural makeup, or night time look with smokey eyes. 
I like the consistency and the way it feels on my lips, keeping them moist and nourished. I hate lipstick that dry out my lips. It doesn't feel greasy and stays on for about 2-3h.
I think I will be buying more MAC lipsticks in the future :)


swtaches: left-daylight, right-with flash

NOTD: ST. PATRICK'S DAY :)

I know that I am a little bit late, as it is 23.35 when I am writing this post, but I had to share my ST.PATRICK'S DAY NOTD :)


I hope you had a lovely day :) x

HANDMADE BATH BOMBS- QUICK TUTORIAL

Hi everyone. 
When I added my first post about handmade bath bombs, many of you asked me to do a tutorial. I really couldn't find time for bath bomb making, but I managed to do it when my son was having a long nap :) 
As promised- here is a tutorial. I am not an expert, I just wanted to know how to make bath bombs, because I was spending too much money on Lush. I done some research, watched videos, bought ingredients and started practising. You can get all the ingredients online, on ebay or from bath bomb and soap making supply stores.

You will need:
-2 parts(cups) of bicarbonate soda
-1 part(cup) of citric acid (fine-not grainy)
-essential oil or cosmetic fragrance oil
-witch hazel or water in a spray bottle
-bath bomb mould
-big bowl
-optional- petals or other decorations
-rubber gloves(if you use colouring)

1.Mix dry ingredients in a bowl until they are perfectly combined.
2.Add a desired amount of fragrance of your choice and start spritzing the mixture with witch hazel or water 
( remember, you will only need a very small amount of water, so do it gradually)
3.When the mixture starts clumping together, you will know that it's ready. Perfect consistency feels like snow-  powdery but when squeezed, it stays packed together like a snowball.
4.Put the mixture into moulds, overfill each half of the mould, push two halves together and squeeze firmly.
5.Demould carefully and leave the bath bombs to dry for 1-2 days.

HERE IS A GREAT TUTORIAL THAT I USED WHEN I STARTED MAKING BATH BOMBS, WITH MANY HELPFUL TIPS, EASY TO FOLLOW. click

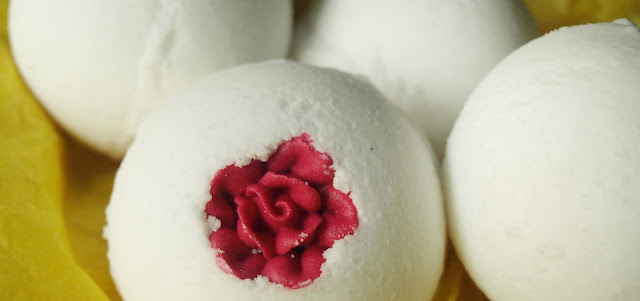
THIS TIME I MADE BUBBLEGUM FRAGRANCED BATH BOMBS:


FIZZING :)


I also made heart shaped ones with some pink colouring and calendula petals:


PS. If just like me, you use a jetted bath tub, don't use bath bombs with petals, as they tend to stay inside the jets and it doesn't smell nice after a few days :)

NEON ACCESSORIES PART 2- bracelets

Hallo my lovelies!
I already told you about my obsession with neon accessories when I made a noir inspired neon necklace.
For the past 2 weeks I've been making neon bracelets in various colours and I could't wait to share some pictures with you. I am totally in love with them and I can proudly say that I made them myself :)
It was really easy- I used plain metal bangles and wrapped them with string, shoe laces, chains, attached some beads and rhinestones. Really simple and anybody can do it :)
I am working on a Neon Noir inspired necklace in bright yellow at the moment and I will share it with you soon.
Here are the handmade bracelets. What do you think?


In the meantime have a look at some beautiful pieces on
www.boticca.com

I will be featuring my favourite pieces from this amazing website on my blog this week. 

Weleda Citrus Refreshing Bath Milk review

Hi everyone.
Today I am reviewing another skin care product- Weleda Citrus Refreshing Bath Milk*.
I received it over 2 weeks ago and I have been using it since.
I can describe it with one word- AMAZING! Just talking about it, makes me want to take a bath right now or at least pour a few drops into a bowl and sit it in the living room :)
I have never smelt anything like this before. It smells better than freshly squeezed lemon juice :) and it is made with natural lemon peel oil.  I add it to my bath and I really don't want the 20 minute soak to end!
After taking a bath with the Citrus Milk, I can smell lemons all day/night. It is incredible!
There is one person that likes it more than anybody else- Simon Cowell :) YES! He really loves this product. You can see him talking about it on TV, he is not being paid for it- he genuinely loves it. 
I found a link for you to watch here. It is really funny :)
The 200ml bottle costs £9.50 and it is really worth the price. I used it many times and have got over 2/3 of the bottle left. I highly recommend it, but beware- it is addictive!!! I will be repurchasing it when it runs out and I can't imagine a bath without it. All natural. That's what I like!
You can get it straight from Weleda's website here.

HOW TO USE IT: Shake the bottle before use. Pour 2 – 3 capfuls into the running water to disperse. A water temperature of 37oC / 98oF is recommended. Do not bathe longer than 20 minutes. After bathing, dry the body gently, cover with a soft towel and ideally relax for at least half an hour in warm surroundings. Use 1 capful to a foot-bath or basin, agitate water with your hand to mix the milk. In the shower or as a quick freshener, use a few drops on a moist cloth. To refresh a room, add a few drops to a small bowl of warm water. When sponging down someone with a fever, add a few drops to the water.


*PR sample
Glossybox the Harrods Edition

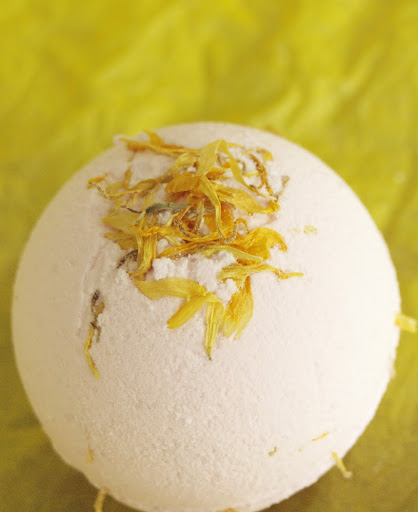
First of all, I want to explain my adventure with Glossybox. I got the subscription as a gift from my husband and he was willing to pay for it every month. I was very happy and excited when I got my first two boxes, than I got the third box and I noticed that the goodies were getting worse with each box... so I cancelled my subscription and told my husband that I will subscribe to another box. A week later I found out that the next box will be a special edition- HARRODS edition! I knew it was going to be a great box, so I subscribed again :) and I am very happy with the contents. I have seen other bloggers getting a cute mini Burberry lipstick and I really really wanted it, but unfortunately it didn't happen.
Here is what I got:


1.Bliss Blood Orange and White Pepper Body Butter.
Deeply moisturizing, skin softening, naturally rejuvenating body butter in mouth watering blood orange and white pepper. RRP-£20.50-200ml


2.Versace Vanitas Eau De Parfum.
A luxurious scent from the house of Versace. Vanitas is a rich and voluptuous fragrance with notes of tiare flower, lime and freesia. 


3.Lancome Teint Miracle.
Natural light creator. Bare skin perfection. Light is not only reflected on the surface: it is also re-emitted from within the skin. I don't need to test it.
It is my Holy Grail foundation. I have been using it for the past 2 years and I love it! 


It is light, it has spf 15 and makes my skin look flawless! RRP-£27- 30ml


4.Clarins Extra Firming Body Cream.
A formula rich in regenerating and firming plant extracts which restore the skin's youthful density and elasticity. 
It smells nice and fresh and it is a good size sample. I like Clarins products so I am very pleased that I got this cream. RRP-£39.50-200ml


5.Revive Intensite Creme Lustre SPF30.
An intensive, firming moisturizer that helps to reduce the appearance of sagging skin. 
This product costs £235 for 60 ml, among it the most luxurious sample in the box. 
I can't wait to test it.


NOTD- pastel/candy/gradient nails

Another experiment with gradient effect. This time I used lovely pastel/candy colours.
I fell in love with the final effect.
To achieve this look I applied 5 different shades of nail varnish. Starting with baby pink, going into Berry Ice Cream, Beth's Blue, Blueberry I/C and Aqua blue at the end!
To finish it off I used some glittery Barry M varnish and a shiny top coat.
I love it!!! Definitely give it a go, as it is really easy, you don't need to be precise, just slap it on :)

PS. excuse my cuticles :) they need some tlc :)

1.Barry M Baby Pink 119 click
2.Barry M Berry Ice Cream 308 click
3.Models Own Beth's Blue NP063 click
4.Barry M Blueberry Ice Cream 306 click
5.Mavala Aqua Blue 130 click
6.Barry M Holograms 244 click
7.Insta-Dri Sally Hansen Top Coat

NOTD- petrol/gradient effect in black and green TUTORIAL


Hi everyone,
Today I want to share my latest nail art creation.
I have seen many gradient manicures lately and I decided to try something similar. 
I think that the final effect looks like petrol :) It is quite easy if you follow this steps:

1.Apply a generous drop of black polish to the bottom of your nail.
2.Quickly apply a drop of green polish to the top of your nail.
3.Blend two colors together with a tooth pick or a needle/pin. Repeat on each nail separately.
4.Wait for the nail polish to dry and apply a top coat.
5.Apply a tiny drop of green metallic polish on the tip of each nail and dab it on with your fingers or makeup sponge. 
Does it sound easy? Let me know if you decide to try this, I would love to see your results :)


01 09 10